Vue Instance Lifecycle & Hooks
In the last couple of posts, you have actually seen a few examples of parts of the Vue instance lifecycle. I didn’t mention it at the time, but let’s now see how some of the things we learned fit into the bigger picture.
Each time we create a Vue instance, there are a series of steps such as data observation, compilation of the template, mounting the instance to the DOM, etc. In-between some of these steps, there are a set of hooks available to us, allowing us to run some arbitrary code at certain stages of a Vue instance’s lifecycle.
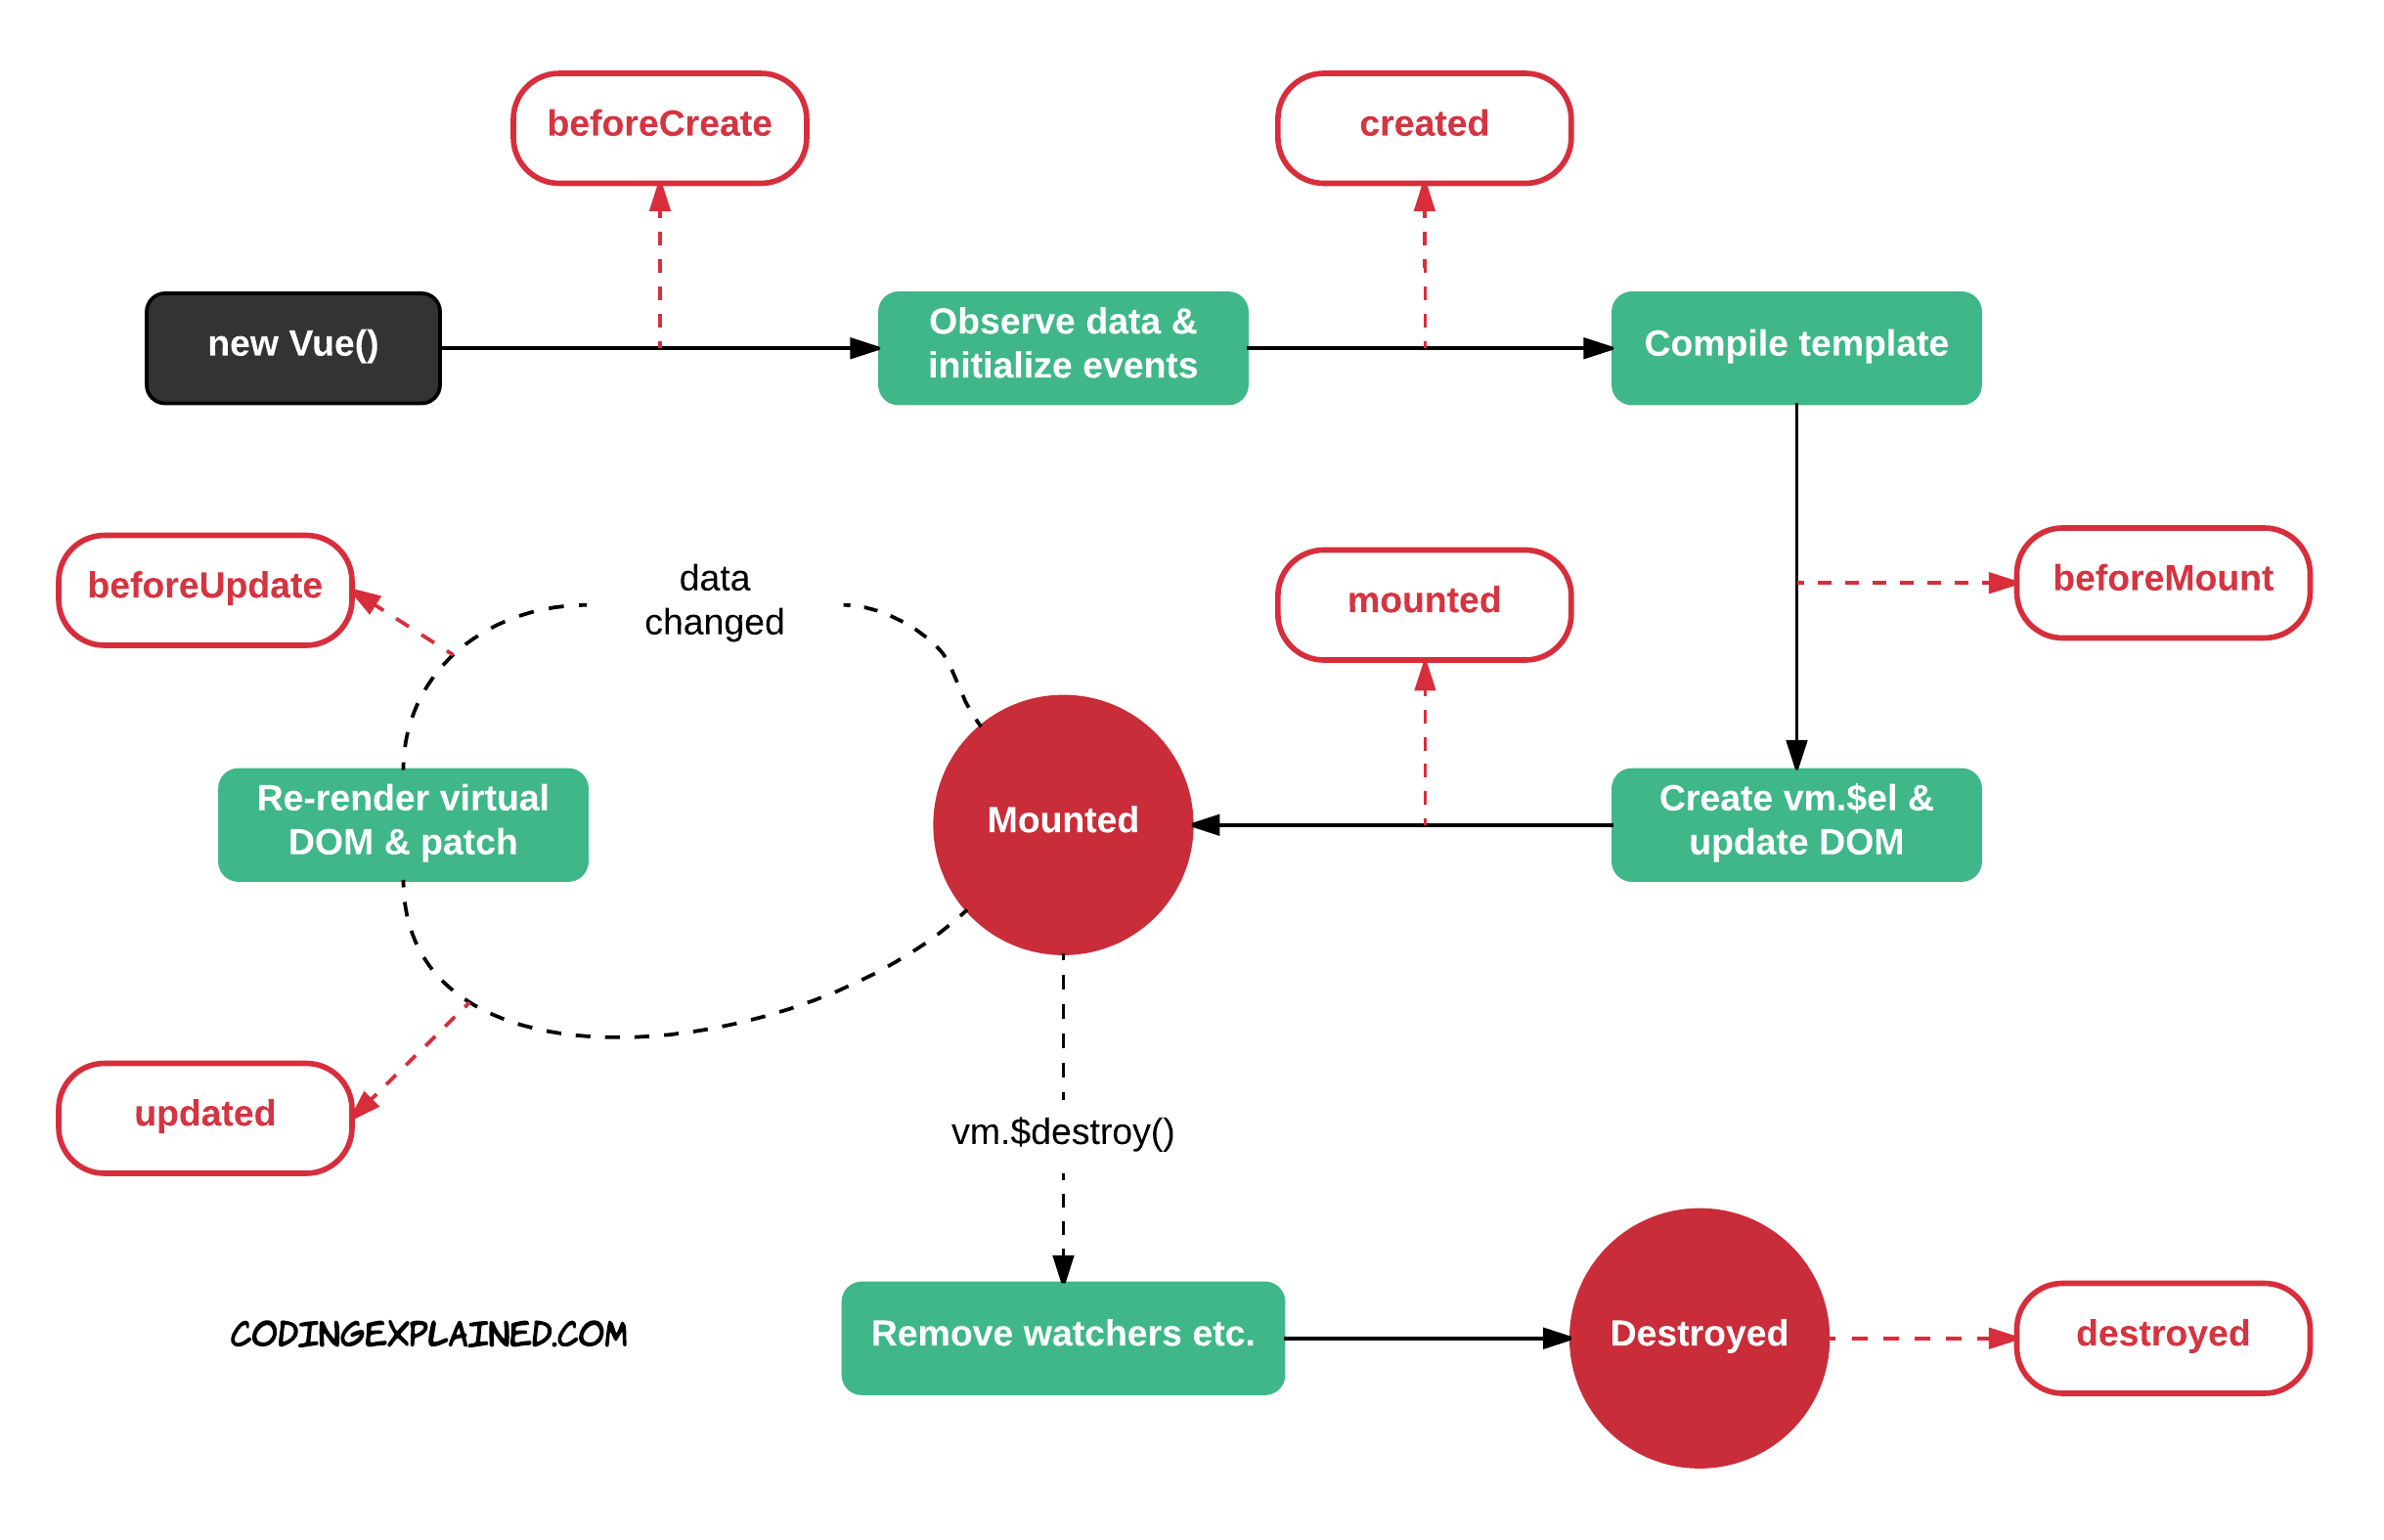
Without further ado, let’s take a look at the Vue instance lifecycle as well as the lifecycle hooks that are available to us. For this, I have created a diagram for you, because it’s always easier to understand if you see a visual representation of it. Notice that within my diagram, the green squares are actions that Vue performs internally, the red ones are lifecycle hooks, and later you will see red circles which represent states that the Vue instance can be in. You will find the explanation of the diagram below it.
The starting point of it all, is when we instantiate the Vue instance by using the new keyword. Immediately thereafter, Vue synchronously invokes the first lifecycle hook named beforeCreate, where you can run some custom code. After invoking this hook, Vue proceeds to set up data observation and initializes events.
Next, we have another hook, named created, which is called synchronously after the instance is created. When calling this hook, the Vue instance’s options have been processed, meaning that data observation, computed properties, methods, etc. have been set up. Thereafter, Vue compiles the template. So it takes our template – whether it’s an inline template or one referenced with the el property – and compiles it. This means that it updates the virtual DOM based on the template. Note that if the Vue instance doesn’t have an el property, then this happens immediately after invoking the $mount method as we have previously done.
The next step is mounting the template, which involves creating the $el property with the rendered HTML markup and inserting this markup into the DOM. So this is where the virtual DOM is rendered and the result is applied to the actual DOM. Before doing all of this, we have a beforeMount hook available to us.
After this, the Vue instance moves into the mounted state, with the mounted hook being invoked just before. At this point in time, a part of the DOM is a snapshot of our template and data. Because data may change in response to events for example, there is an ongoing “loop” you could say. When some data changes, the virtual DOM is re-rendered, and the DOM is patched with the appropriate changes. Before this happens, a beforeUpdate hook is invoked, and after the DOM has been updated, the updated hook is invoked. This process repeats every time data changes.
Now we’re at the end of the Vue instance’s lifecycle, more specifically when it is destroyed. When this happens, the Vue instance cleans up after itself by removing watchers, event listeners etc. The Vue instance then moves into the destroyed state and invokes the last hook named destroyed.
Believe it or not, this was actually a slightly simplified walkthrough of the Vue instance lifecycle. The actual process is slightly more verbose, but what you see on the above diagram are the important parts. The full lifecycle includes a few decisions, mainly in regards to mounting the template. If you are curious to see a diagram in slightly more details, then here is a link to the official one.
Anyways, now that you understand the Vue instance lifecycle in more details, let’s take a closer look at how to make use of the lifecycle hooks.
Here is what you will learn:
- How to build advanced Vue.js applications (including SPA)
- How Vue.js works under the hood
- Communicating with services through HTTP
- Managing state of large applications with Vuex
- ... and much more!


2 comments on »Vue Instance Lifecycle & Hooks«
Hi, thanks for the diagrams. In which app/tool are they made?
The diagrams were made with LucidChart. :-)